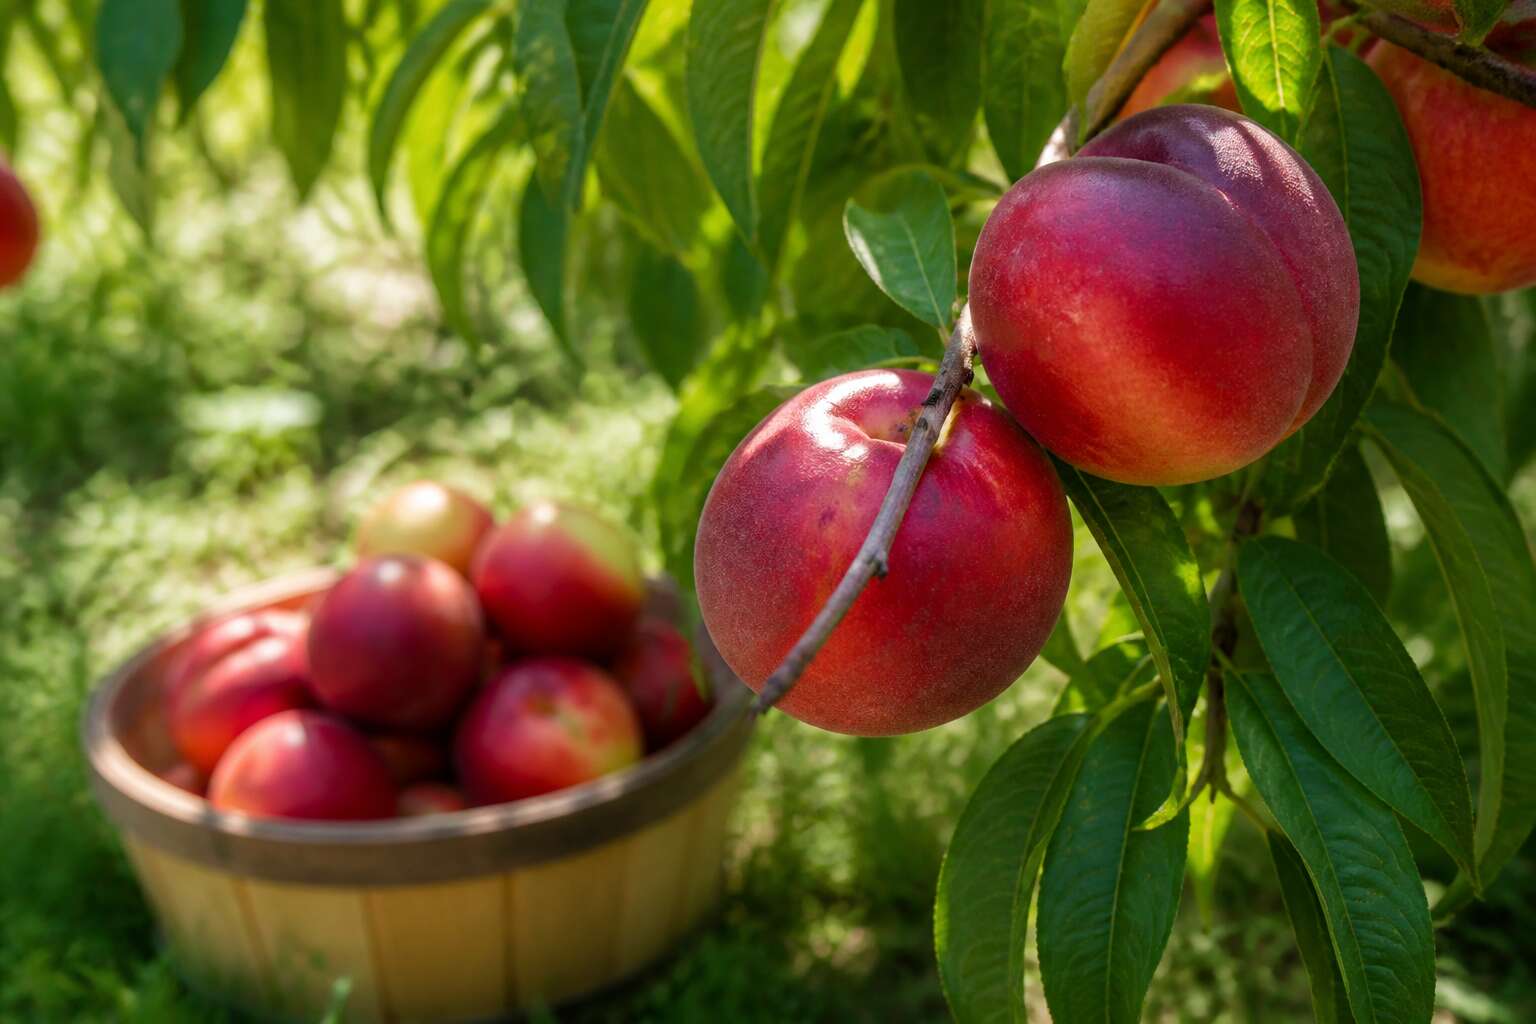
Selecting the Right Nectarine Variety
Understanding Hardiness Zones and Chill Hours
Choosing the right nectarines fruit tree begins with a sober assessment of your local climate. In South Africa, winter chill varies dramatically from the Western Cape to Gauteng. Many commercial cultivars demand 500 to 800 chill hours, while low chill types such as ‘Sunlite’ require only 200.
Hardiness zones matter just as much. The Highveld’s frost risk can damage early blossoms, so late flowering varieties are safer there. Coastal regions with mild winters need low chill selections to avoid failed fruiting.
I always tell growers to match the cultivar’s chill requirement against their region’s average annual hours below 7°C. A simple checklist helps:
- Confirm your zone’s minimum winter temperature.
- Estimate the accumulated chill hours in your specific valley or suburb.
- Choose a nectarine variety bred for that exact range.
Only then can your nectarines fruit tree deliver reliable harvests year after year.
Freestone vs. Clingstone Nectarines
The real decision, however, begins after you have matched your local climate to a specific cultivar. It is the moment you must choose between the two main types of fruit: freestone and clingstone. This choice dictates everything from how you eat the fruit fresh from the branch to how you will spend your afternoon in the kitchen. For many, the first bite into a perfectly ripe nectarine is the ultimate reward of growing your own nectarines fruit tree, and the texture of that bite is determined by this very classification.
Freestone varieties live up to their name. When you slice one open, the flesh separates cleanly from the central pit, making them a joy for fresh eating and simple desserts. Clingstone varieties, as their name implies, hold their flesh tightly to the stone, which makes them slightly messier to eat out of hand, but this very characteristic often points to deeper flavour and a firmer texture that holds up beautifully to heat.
Think about your end goal before you plant, as the right nectarines fruit tree variety will serve you for decades. The choice often comes down to a simple list of priorities:
– For canning and baking: select a clingstone variety for flesh that retains its shape.
– For fresh snacking: choose a freestone variety for effortless slicing.
– For heavy yields: look for late-season clingstones which often produce more fruit per branch.
While the stone’s behaviour is the technical difference, it often aligns with the fruit’s personality. Freestone nectarines tend to soften rapidly, offering a melt-in-the-mouth experience that demands immediate consumption. Clingstone types are typically firmer and more aromatic, perfect for those who prefer a bit of crunch in their nectarines fruit tree harvest. By selecting a mix of both, you extend your fresh fruit season and ensure you have the right texture for every culinary project, from a simple cheese board to a bubbling cobbler.
Dwarf, Semi-Dwarf, and Standard Tree Sizes
I have seen a standard nectarine squeezed into a narrow boundary, becoming a towering burden rather than a healthy harvest. The choice of size is a quiet moral decision about your relationship with the ground. A standard nectarines fruit tree demands ladders and long reaches, while a dwarf limits your feet to the earth.
In South African gardens, space is a direct contract with the available soil. Dwarf types typically stay under two metres, fitting perfectly beside patios and high density walls. Semi-dwarf varieties reach about four metres, giving a modest yield without monopolising your entire outdoor living scene.
- Dwarf: the only ethical choice for containers or paved courtyards.
- Semi-dwarf: a generous, versatile option for an average residential plot.
- Standard: thrives only where you can dedicate significant lateral room.
Choose the size of your nectarines fruit tree based on the height you are willing to reach for a perfect cluster. That specific vertical extent dictates every future prune and harvest. It is the definite first question of your horticultural patience.
Top Cultivars for Home Orchards
South African home orchards deserve cultivars matched to local conditions. ‘Arctic Pride’ handles warmer coastal regions, while ‘Red Gold’ performs well in cooler Highveld gardens. Each variety carries its own ripening rhythm and flavour profile.
For compact spaces, ‘Pink Passion’ offers ornamental blossoms alongside fruit. ‘Goldmine’ remains a steadfast heirloom choice. When choosing your nectarines fruit tree, weigh the harvest window against your household’s needs.
- ‘Arctic Star’ for early summer eating
- ‘Flavortop’ for intense sweetness
- ‘Sunlite’ for improved disease resistance
Match the cultivar to your microclimate rather than the reverse. A nectarines fruit tree planted without foresight demands correction later.
Planting Your Nectarine Tree for Success
Choosing the Ideal Planting Site
Consider this: a single nectarine tree can produce enough fruit to exhaust an entire family’s imagination for jam, cobblers, and plain snacking. Yet most trees fail not from neglect, but from a poorly chosen plot. The ideal site for your nectarines fruit tree demands forethought, not luck.
Start with solar exposure. These trees require a minimum of eight hours of direct, unfiltered sunlight. South African summers are brutal, but morning sun with afternoon shade can reduce leaf scorch. Next, examine the soil. A loamy, well-draining medium with a pH between 6.0 and 7.0 keeps roots healthy. Avoid low-lying areas where frost pools like a stagnant pond.
- Choose a spot with good air circulation to prevent fungal diseases.
- Ensure at least 4 to 5 meters of clearance from walls and other trees.
- Test drainage by digging a hole and filling it with water; it should empty within an hour.
When you dig the planting hole, make it twice as wide as the root ball but no deeper. Position the graft union, the visible bump, at least 5 centimeters above ground level. Backfill with native soil, not compost, to avoid water pooling around the root zone. Water deeply and apply a thick layer of mulch, but keep it away from the trunk.
The best time to plant is during winter dormancy, when the tree is in a state of quiescence. Staking is optional for young specimens, but use a flexible tie to prevent girdling. A well-sited nectarines fruit tree rewards you with bounteous harvests for decades; a poorly sited one provides an education in horticultural regret.
Soil Preparation and Drainage Requirements
The root system of a nectarines fruit tree craves a precise balance of moisture and oxygen. Failing to prepare the soil properly affects both. Dense clay acts like a wall, but adding water and compost on top is the only trick. To get it right, incorporate sharp sand or horticultural grit into the top 30cm of the bed.
I will be honest about the drainage test. Dig a 40cm hole, fill it with water, and wait one full hour. The water must be gone completely. If it is not, the site is inadequate, no matter what you have heard. The clever fix is planting above the ground:
- Build the mound at least 30cm above the surrounding grade.
- Ensure the runoff flows away from the trunk continuously.
- Use exposed topsoil to scatter a thin layer of mulch.
Regularly loosened soil beats last minute amendments. The nectarines fruit tree only asks for a clean root drift and a seasonally dry crown.
Step-by-Step Planting Instructions
The planting hole decides everything. Dig it twice as wide as the root ball, but only as deep as the roots themselves. A deeper hole invites the tree to sink, and a sinking nectarines fruit tree suffocates.
Position the tree so the graft union sits clearly above the soil line. I always backfill with the original soil, not imported compost. Firm the ground with your heel, then water deeply in one slow pour!
Check the straightness from two angles. Stake loosely, using a flexible tie. Remove the stake after one season.
Let the tree settle without fertilizer. The root system needs time to recover from transplant shock before it faces nitrogen.
When to Plant: Spring vs. Fall
South African gardeners face a choice that affects the health of every nectarines fruit tree: spring planting or autumn planting. From late August to October, spring gives roots time to establish before summer heat. The soil warms slowly, and seasonal rains cut watering duties.
Autumn, from March to May, offers cooler air and still-warm earth. Roots grow steadily while the tree rests, ready to burst in spring. This timing suits frost-free regions, while spring works better where late frosts threaten.
- Check your local frost dates first.
- Monitor soil moisture for six weeks after planting.
Align your planting date with these patterns, and your nectarines fruit tree will reward you with vigour.
Spacing and Companion Planting Tips
I have watched orchardists plant trees too close, and every one of them struggled. Spacing determines how well a nectarines fruit tree performs. Standard trees need 5 to 6 metres between trunks. Semi-dwarfs need 3.5 metres. Dwarfs manage with 2.5 metres. These gaps allow light and airflow, which reduce fungal pressure. In smaller gardens, a fan-trained tree against a sunny wall saves space and boosts ripening.
Companion planting adds function. Chives and garlic deter aphids. Borage attracts pollinators. Marigolds repel nematodes. Keep these near the drip line, not against the trunk.
- Avoid planting other stone fruits close by.
- Keep lawn grass away from the root zone.
Grass is a fierce competitor for water. A mulched circle under the canopy keeps soil moist and steady. Plan the gaps first. The nectarines fruit tree rewards good spacing with vigorous growth and heavier crops.
Essential Care: Watering, Mulching, and Fertilizing
Establishing a Consistent Watering Schedule
Getting water right on a nectarines fruit tree is a lesson in consistency, and South African summers will test your patience. Young trees need deep soakings twice weekly for the first two seasons. Mature trees prefer heavier irrigation, but less frequently. Check the soil at 15 cm depth. If it feels dry, water. If it clings, wait. That simple habit prevents root rot and fruit splitting, and I have seen it save more trees than any fertiliser.
A 10 cm mulch ring, kept clear of the trunk, protects roots from heat spikes. Use compost, pine bark, or straw.
Fertilising follows a rhythm: apply a balanced slow release product in early spring and again after harvest. Watch for these warning signs that your tree is out of balance:
- Leaves turning yellow between veins
- Poor shoot growth
- Fruit splitting before ripening
Mulching to Retain Moisture and Control Weeds
The nectarine is a greedy sovereign, and its currency is moisture. Without a layer of good mulch, the sun will steal every drop before the roots ever know it existed. A thick skirt of compost or pine bark, laid down each spring, keeps the soil cool and the weeds at bay. It also feeds the earth as it breaks down.
Fertilising is a quieter affair but no less vital. A balanced feed in early spring, and again after the fruit has set, gives the tree the fuel for a heavy crop. Watch for signs of distress in the leaves or poor shoot growth, and adjust the dose. The tree will not forgive neglect, but it rewards those who pay attention. The nectarines fruit tree thrives on this patient care.
Nutrient Needs and Fertilizer Types
The Nectarines Fruit Tree: Modern Care for Watering, Mulching, and Fertilizing
Growing a healthy nectarines fruit tree requires consistent care, not guesswork. Watering remains the strongest tool you own. Young trees need deep, infrequent soaks; mature ones run on a weekly schedule in dry weather.
Mulching does the heavy lifting. A thick ring of compost or bark lowers soil temperature, blocks weeds, and breaks down to feed the soil. This mulching process slowly releases nutrients, keeping every fine root active.
Fertilizing follows just as the flowers set in spring, and again in early summer, balancing growth with fruit production. The nutrient and fertilizer needs shift when planted in sandy ground, where a simple NPK formula often works well. With the sun up, these small choices accumulate into quality. Watch the leaf’s edge, hold back once shoots find their pace. It is careful, practical, and honest work.
Seasonal Fertilization Calendar
About one third of all the effort you invest in a nectarines fruit tree happens at the feeding trough, so to speak. Timing decides whether that effort becomes sugar in the fruit or just another season of leafy, unproductive growth. The calendar is not a suggestion. It is a fixed schedule you adjust only for your specific weather and soil.
The typical cycle follows three feeding windows, each with a distinct purpose:
1. The first application lands in late winter, roughly six weeks before the last expected frost, to wake the roots and support bud break.
2. The second, larger portion goes on after fruit set in late spring, when the tree shifts energy toward swelling the pit and flesh.
3. The third and final feeding arrives in early summer, a lighter dose to sustain leaf health without pushing late, frost-prone shoots.
Nitrogen dominates the early feedings because the canopy needs to unfold quickly and cover the developing fruits with shade. Potassium becomes more important by the second and third rounds, as it drives sugar transport and firmness. Phosphorus rarely needs extra attention in established ground, but a balanced formula in sandy South African soils helps support the root system during summer heat.
Watch the tree between these windows. If shoots stretch beyond 50 centimetres in a season, reduce the next nitrogen application. If leaf colour fades to a pale green, move the next feeding earlier. The calendar guides, but the tree corrects.
Recognizing Signs of Over or Under Watering
Water stress punishes a nectarines fruit tree faster than almost any pest or disease. Fruit splitting, leaf curl, and premature drop all trace back to irregular moisture in the root zone. A mature tree can drink over 40 litres of water per day during a hot Highveld summer, so guessing is not an option.
Read the tree, not the calendar. New shoots wilting at midday during a heatwave suggests the roots cannot keep up with transpiration. But yellowing leaves and waterlogged soil point in the opposite direction, especially after heavy summer thunderstorms on clay-heavy beds.
Here is what to look for:
– Underwatering: dull, grey-green leaves that droop by midday, brittle twigs that snap rather than bend, and soil that crumbles dry below the first 5 centimetres.
– Overwatering: leaves that turn pale green or yellow, a sour smell rising from the soil, and new growth that looks soft and water-soaked rather than firm and crisp.
The mulch layer changes how you interpret these signs. A thick organic mulch slows evaporation, which means a tree sitting on 10 centimetres of bark chips needs far less frequent irrigation than one growing on bare, baked earth. But mulch also traps moisture, so check the soil beneath the mulch, not the surface of it. If the topsoil stays constantly wet, the feeder roots will suffocate even though the canopy looks healthy.
Water deeply but less often. A slow soak that penetrates 60 to 80 centimetres encourages roots to chase moisture downward. That resilience carries the nectarines fruit tree through the dry spells that hit Gauteng and the Western Cape in late summer. Frequent shallow watering produces a shallow, dependent root system that panics the moment the hose stays off.
The relationship between watering and fertilising also matters. Water carries the nitrogen and potassium you apply into the root zone. A dry soil profile will hold those nutrients hostage near the surface, where they volatilise or wash away in the next storm. Apply fertiliser before a scheduled deep watering, not after a heavy downpour has already saturated the ground.
Pruning and Training Nectarine Trees
Why Pruning Is Critical for Fruit Production
Left alone, a nectarines fruit tree becomes crowded and unproductive. Pruning removes excess growth and directs energy to fruit-bearing wood. Without it, your tree spends resources on shaded branches that yield nothing. Research from Stellenbosch shows that well-pruned trees produce up to 30% more fruit. So grab your secateurs.
- Remove the three D’s: dead, diseased, and dodgy limbs.
- Thin out crossing branches that rub and wound each other.
- Open the center to let sunlight in and air circulate.
Training starts when the tree is young. Bend branches to a 45-degree angle. This forces growth sideways, not upward. Straight vertical growth creates shade and reduces fruit quality.
Pruning Tools and Sanitation Practices
Sharp tools make clean cuts. Dull blades crush the wood, leading to rot. Here are the essentials:
- Secateurs for small branches
- Loppers for medium growth
- A pruning saw for thick limbs
Sterilize every blade before use. For a nectarines fruit tree, dip them in methylated spirits or a bleach solution. This kills fungal spores that survive in dried sap. Clean the handles too. Training cuts on young wood need the same sterile blade. Wipe down the entire tool after each pruning session.
I carry a spray bottle with disinfectant into the orchard. It takes seconds between trees. Rust weakens the blades over time. Dry your tools before storing them.
Open-Center Pruning Technique
An open centre is the preferred shape for a nectarines fruit tree. It is not a natural form. The tree wants to grow a central leader. You must remove that impulse. The goal is a vase-like structure with three to five main scaffolds radiating from a short trunk.
Make the initial heading cut at planting time or the following dormant season. Select the strongest, widest-angled branches. Remove the central trunk entirely. Strip any growth below the chosen scaffolds. The result is a tree where sunlight penetrates to every fruiting spur. Air moves freely, drying moisture that causes brown rot.
A young tree needs this structure set before it bears heavy crops. Choose branches with a crotch angle of at least 45 degrees. These support fruit without splitting. Remove branches with narrow, upright crotches:
– Vertical shoots grow vigorously but produce little fruit
– They compete with the main scaffolds
– They create dense shade in the canopy centre
– They rub against other branches, creating wounds
Without this initial training, a nectarines fruit tree becomes a thicket. Fruiting wood dies in the shade. You get a small crop at the top, out of reach. The work is easier on a young tree. A two-year-old branch is much harder to bend or cut than a whip. Spend the time in the first season.
Summer Pruning vs. Winter Pruning
The difference between a productive nectarines fruit tree and a tangled mess often comes down to timing. Winter pruning, performed during dormancy, is the bold, structural work. You remove entire branches, open the centre, and set the scaffold. The tree responds with vigorous spring growth.
Summer pruning is corrective and light. In the heat of a South African December, you trim water sprouts and shorten vigorous shoots. This check keeps the tree manageable and directs energy into the developing fruit.
- Winter: prune for structure and health
- Summer: prune for control and light exposure
A nectarines fruit tree needs both approaches. Winter builds the framework. Summer refines it. Neglect either season, and the canopy thickens, fruiting wood declines, and the harvest suffers. The two pruning sessions work together, and the tree rewards attention paid in both.
Training Young Trees for Strong Structure
Most pruning mistakes happen in year one. A young nectarines fruit tree needs deliberate training, not random snipping. The first winter, select three or four scaffold branches spaced around the trunk. Remove everything else. It feels aggressive, but the tree recovers quickly and the structure lasts decades.
When choosing scaffolds, look for:
- Wide crotch angles
- Even spacing around the trunk
- Shoots at chest height or lower
Summer pinching of young shoots guides growth without heavy cutting. A trained tree produces better fruit because energy goes where you direct it, not into a tangle of random wood.
Rejuvenating an Overgrown Tree
Let’s be honest. If you have inherited an overgrown nectarines fruit tree, you are not pruning. You are wrestling with a decade of deferred decisions, and the tree has already made most of them for you! The good news is that these trees forgive almost anything except neglect, and even that they tolerate for longer than they should.
Rejuvenation means cutting back hard into three year old wood, sometimes removing half the canopy in one winter. You will find:
- Branches that crossed so long ago they have fused into permanent grudges
- Deadwood harbouring insects that have been paying rent for years
- Water shoots rising vertically, each one aimed at the sky and ignoring every rule you plan to enforce
The worst offenders come out first. The rest gets thinned over two seasons, which keeps the tree from panicking and regrowing everything overnight. A rejuvenated tree will reward your boldness with vigorous shoots and proper fruit again.
Managing Pests and Diseases
Common Insect Pests: Aphids, Borers, and Mites
An aphid’s feeding is a quiet theft, a siphoning of the very lifeblood from your nectarines fruit tree. The borer, however, is a more sinister tenant, tunneling within the cambium and leaving a gnarled scar. Mites, in their spectral billions, can drain the color from a leaf until it pales to a brittle, silvered husk. Vigilance is a ritual for the orchardist. You must inspect the undersides of leaves and the union of trunk and root, where these invaders often harbor.
Recognition is half the battle, and each pest leaves its own mark of presence. Consider the distinct signatures:
– Aphids cluster on new growth, leaving a sticky honeydew that attracts ants.
– Borers betray themselves with a fine, sawdust-like frass near the base of the trunk.
– Mites cause a stippled, dusty look on the foliage, often accompanied by fine webbing.
Left to their own devices, these creatures can weaken a tree to the point of ruin, inviting fungal diseases to settle in the wounds they create. The fight requires a steady hand. A forceful jet of water can dislodge the soft-bodied aphids, while horticultural oil smothers overwintering mite eggs. For borers, a wire probe inserted into their tunnel is a brutally effective solution. The health of your nectarines fruit tree is a persistent, ongoing negotiation with the natural world. Watch for the glint of a leaf that is not quite right, and act with quiet certainty.
Fungal Diseases: Brown Rot, Leaf Curl, and Powdery Mildew
Fungal diseases threaten nectarines fruit tree orchards when conditions turn damp and cool or warm and humid. Brown Rot strikes as ripening fruit approaches its peak, transforming a promising nectarine into a shriveled, mummified husk overnight. I have watched a single rainy week undo an entire harvest. Leaf Curl emerges earlier, curling new leaves into blistered, reddish distortions that weaken the tree’s vigor. Powdery Mildew coats young shoots with a white fungal film, stunting growth.
The patterns are distinct:
- Brown Rot shows as small, brown spots that spread rapidly over fruit surface
- Leaf Curl distorts new foliage into thick, crinkled shapes
- Powdery Mildew leaves white, powdery patches on leaves and shoots
Once our nectarines fruit tree reveals these signs, immediate action is necessary! Copper-based sprays applied during dormancy help control Leaf Curl before it begins. For Brown Rot, remove infected fruit promptlyand dispose of it away from the orchard. Powdery Mildew responds to sulfur applications, though timing impacts effectiveness. Understanding these diseases transforms}a gardener from reactionary to prepared, ensuring the tree’s energy goes toward producing sweet, juicy fruit rather than fighting infection.
Integrated Pest Management Strategies
Every orchard is a living system, and the nectarines fruit tree sits at its center. Integrated Pest Management is a habit of attention, not a fixed formula. I walk my rows weekly, checking undersides of leaves and the crevices where bark meets branch. When I spot a few aphids, I do nothing. The ladybirds will handle them! The real skill is knowing when intervention is necessary.
A complete strategy combines several approaches:
- Choose resistant cultivars where possible
- Encourage beneficial insects with diverse flowering plants
- Apply horticultural oils only when pest numbers cross a threshold
- Remove dropped fruit promptly to break pest cycles
This layered approach keeps the nectarines fruit tree resilient without relying on a single tactic.
Organic Control Methods and Sprays
Organic control requires close reading of the weather. In the highveld heat, I gauge humidity before any spray leaves the tank. My nectarines fruit tree draws in the residues quickly, so I stay disciplined about volume. The simplest measured mix usually outperforms a heavy cocktail.
The organic toolkit is small, but specific:
– Neem oil diluted to 1.5% targets soft insect stages.
– Potassium bicarbonate works best against active fungus.
– Cold pressed horticultural oil blocks overwintering scales.
Each of these products needs a dry window of six hours. Organic control is time sensitive. I apply at sundown, coat the branch junctions and leaf undersides, then wait. A fortnight later, the nectarines fruit tree will shed any residue, leaving no trace beyond the fleet. That patience rewards you on the palate.
Monitoring and Early Detection Tips
Each morning I walk my rows with a hand lens and a notebook. The nectarines fruit tree shows its condition before any spray becomes necessary. A silver trail on the bark, a curled leaf, a droplet of gum at a branch fork. These specific signs indicate the first stage of a problem.
Early detection means checking the undersides of leaves and the junctions where pests like to hide. I also record weather patterns, because warmth and moisture change the risk.
- Distorted new growth signals aphid activity.
- Frass, fine sawdust like material, points to borers.
- Stippled leaves indicate mite feeding.
None of these signs force panic. Each one asks for a careful check. Early attention prevents heavier measures later.
Harvesting and Storing Nectarines
Signs of Ripeness and Harvest Timing
Determining the perfect moment to pick from your nectarines fruit tree takes patience and sharp observation. In South African orchards, most cultivars reach maturity between late spring and late summer. Look for fruit that feels heavy for its size, no longer rock hard, yet never mushy.
A nectarines fruit tree signals ripeness through colour and texture. The background shifts from green to a warm yellow or cream, and the stem end yields slightly under gentle pressure. A sweet, floral fragrance rises from the fruit. Trust your senses!
– The seam is well defined and deep
– The skin gives faintly when pressed lightly
– The ground colour has turned fully golden
Once harvested, nectarines stop accumulating sugar. Leave slightly underripe fruit on the kitchen counter for a day, then refrigerate. Do not stack them deeply, as bruising invites mould. Careful handling at harvest preserves every bit of flavour.
Proper Harvesting Techniques to Avoid Bruising
Grasping a ripe nectarine with two fingers leaves thumb-print bruising that ruins a perfect morning’s work. For a nectarines fruit tree, the twist-and-lift motion matters more than force. Cradle each fruit in an open palm, rotate gently until the stem separates from the branch, then lower it into a padded picking bag.
- Use sharp secateurs for stubborn stems; pulling tears the bark
- Work in the cool morning hours while fruit remains firm and turgid
- Handle each fruit exactly once, never toss or drop
Bruises you cannot see at harvest surface as darkened patches within twenty-four hours. Line your basket with soft cloth and keep the harvest to a single layer. Deep piles invite pressure points, and pressure invites rot. Shallow trays, the kind South African farmhouses have used for generations, let each nectarines fruit tree yield keep its integrity from orchard to kitchen.
Storing Fresh Nectarines at Home
After harvest, nectarines continue to ripen, so the work does not end at the orchard. A nectarines fruit tree gives fruit that breathes even after picking, releasing ethylene gas and softening by the day. Left on the counter, a firm nectarine reaches its peak in two to three days. The fridge halts that process, but cold dulls flavor, so wait until the fruit yields slightly to gentle pressure before chilling.
Humidity matters. The crisper drawer with the vents closed keeps moisture high, preventing shrivel. A paper bag on the counter speeds ripening by trapping ethylene, but never crowd the fruit with damaged pieces. One spoiled nectarine can ruin a whole bowl.
Check stored fruit daily. Stems puncture neighbors, so place each nectarine stem-side down in a single layer. Stone fruit keeps for a week under these conditions, which is enough time to enjoy every piece from your nectarines fruit tree.
Preserving Your Bounty: Canning, Freezing, and Drying
Preserving your nectarines fruit tree’s harvest extends the season well beyond summer! Each method demands attention to texture and acidity. I find that canning requires a water bath for safe storage. Freezing benefits from a light syrup to prevent browning. Drying concentrates sugars, producing chewy slices.
Consider these practical steps:
- Peel and pit before canning to prevent bitterness.
- Spread pieces on a tray for freezing before bagging.
- Treat slices with lemon juice before dehydrating.
The fruit’s natural pectin helps canned nectarines hold structure. Within months, you will taste the tree’s essence.
Extending Shelf Life with Cold Storage
Cold storage is where nectarine ambitions go to hibernate. Your nectarines fruit tree may produce a glut, but the fridge turns abundance into a controlled miracle. At 0 to 1 degrees Celsius, respiration slows, buying two to three weeks. Higher humidity prevents shrivel.
- Chill within hours of harvest.
- Keep fruit unwashed until serving.
- Separate from odorous neighbours.
Cold merely pauses the decay clock; flavour stays put. Remove them a day before eating so the sugars wake up.


0 Comments