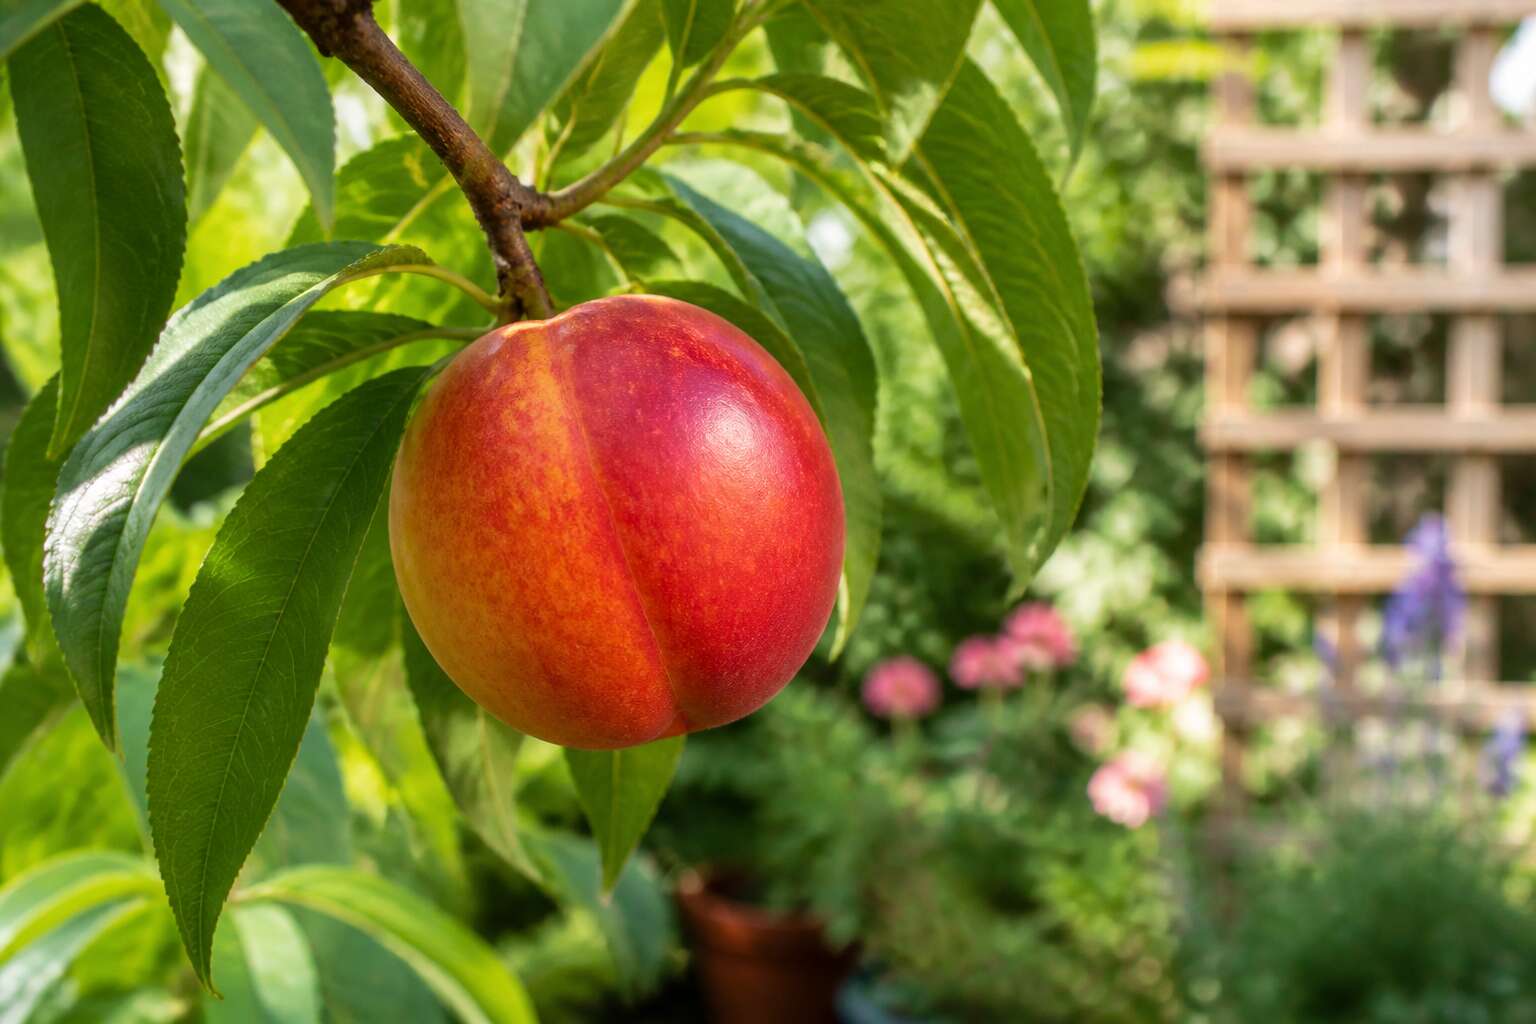
Selecting the Perfect Nectarine Variety
Understanding Climate and Hardiness Zones
The finest nectarine you will ever taste is the one you pick at dawn from your own tree. But that flavour begins months earlier in the nursery, with a choice that many home gardeners rush. South Africa offers a surprising array of cultivars, each with its own temperament:
- ‘Sunlite’ thrives in the Western Cape’s Mediterranean rhythm.
- ‘Fantasia’ rewards temperate pockets with generous, juicy fruit.
- ‘Pioneer’ holds steady through the hotter, erratic summers of Gauteng.
Understanding hardiness zones is the quiet science beneath this art. Coastal gardens, with their mild winters, rarely satisfy a nectarine’s chill requirements. The Highveld, ironically, offers the colder dormant season the tree craves. This alignment of cultivar, zone, and season sits at the heart of how to grow nectarines at home.
Dwarf vs. Standard Rootstocks for Small Spaces
Space constrains variety selection more than climate does. A standard rootstock nectarine can reach five metres, which overwhelms a townhouse courtyard. Dwarf rootstocks, such as ‘Starkrimson’ budded onto Prunus besseyi, keep the tree under two metres while bearing full sized fruit. This matters for how to grow nectarines at home when your garden is measured in metres, not hectares.
Rootstock determines vigour, while the scion determines flavour. Semi dwarf options suit a three metre bed. Standard trees demand five metres of clearance. Match the rootstock to the space before you fall for a cultivar’s description in a catalogue.
- ‘Ruby Diamond’ on dwarf rootstock thrives in a half barrel.
- ‘Arctic Pride’ performs poorly when grafted onto dwarfing stock.
- ‘Goldmine’ tolerates restricted roots in a sunny courtyard.
Your nursery can confirm which rootstock matches your soil and your ambitions. That conversation saves years of corrective pruning.
Self-Pollinating vs. Cross-Pollinating Cultivars
When selecting nectarine varieties, the first question is whether your tree needs a partner. I have found that most nectarines are self-pollinating, meaning one tree alone bears a heavy crop. That simplifies how to grow nectarines at home in a compact yard. For example, ‘Ruby Diamond’ and ‘Goldmine’ set fruit without a companion.
However, a few cultivars, such as ‘Arctic Pride’, perform better when cross-pollinated. They require a second tree with overlapping bloom time. If space is tight, check the tag for the phrase “self-fertile”. A reliable nursery can confirm!
Consider these self-pollinating types:
- ‘Fantasia’ suits warm summers.
- ‘Pioneer’ thrives in mild winters.
- ‘Honey Kist’ tolerates coastal winds.
For cross-pollinating types, you need two different cultivars that bloom together. Understanding this subtle difference saves you the sorrow of a bare branch in spring, which is a common pitfall when learning how to grow nectarines at home.
Buying Bare-Root vs. Potted Nursery Trees
Nursery catalogues list over a hundred nectarine cultivars, yet most gardeners choose on appearance alone. I have learned that the right variety depends on local disease pressure and intended use. For South African gardens, ‘Crimson Delight’ resists leaf curl better than most, while ‘Spring Mist’ handles humid coastal regions. Ask a nearby nursery what sells well, then match that to your taste.
Bare-root trees offer a wider selection and lower cost, but you must plant them during winter dormancy. Potted trees cost more and allow flexible planting dates. Inspect bare-root roots for moisture; check potted specimens for root binding. When you master how to grow nectarines at home, the purchased tree form determines early survival.
Site Preparation and Planting Techniques
Choosing a Sunny, Sheltered Location
Sunlight dictates everything in a nectarine tree’s life. Without eight solid hours of direct sun, fruit stays small and sour. Learning how to grow nectarines at home begins with a careful reading of your garden’s light. Walk the yard at different hours and note where shade lingers. North facing brick walls warm quickly, yet a simple drift of morning sun often works best.
Shelter matters as much as exposure. Winter wind strips blossoms, while late frost pools in low basins. A fence or gentle slope breaks that cold flow.
- Morning shade marks the precise planting spot.
- Heavy clay signals the need for added grit.
- Overhanging eaves drip cold air at night.
Planting itself stays simple. Dig a wide, shallow hole, tease out the roots, and backfill with compost enriched soil. The whole method of how to grow nectarines at home depends on this foundation.
Soil Requirements and pH Balancing
South African soils run to extremes, from the acid sands of Mpumalanga to the calcareous clays of the Karoo. A nectarine tree will not negotiate. Test the ground before you dig. The ideal pH sits between 6.0 and 6.5. Below that, add agricultural lime. Above it, work in sulphur or composted pine bark.
Site preparation rewards patience. Remove grass and perennial weeds in a two metre circle. Dig the hole only as deep as the rootball but three times as wide, encouraging lateral root spread.
- Break up compacted subsoil with a fork.
- Mix excavated soil with well-rotted compost at two parts soil to one part compost.
- Water the hole thoroughly one day before planting.
The heart of how to grow nectarines at home lies in matching the soil to the tree’s demands from day one. Raised beds help where winter rain pools. Mound planting works on heavy clay. Get the ground right, and the tree will perform.
Proper Spacing and Companion Planting
Planting day is where patience meets precision. When you learn how to grow nectarines at home, the planting technique sets the stage for decades of fruit. Dig the hole three times the width of the rootball but no deeper. Position the graft union two to three centimetres above the soil line. Backfill gently, pressing out air pockets. Water deeply to settle the ground.
Proper spacing is non-negotiable. For how to grow nectarines at home, follow these guidelines:
– Standard trees need four to five metres between rows
– Dwarf trees require two to three metres
– Espaliered fans fit within one and a half metres
Crowding invites fungal disease, so respect the distances. Companion planting adds a layer of protection. Place chives, garlic, or marigolds near the drip line to deter aphids and borers. Avoid nightshades and old stone fruit debris. These small choices, made on planting day, determine how easily your nectarine tree settles into its permanent spot.
Digging the Perfect Planting Hole
Digging the perfect planting hole takes twenty minutes but saves years of regret. Before the spade breaks ground, prepare the site by clearing grass and perennial weeds within a metre radius. When digging the perfect planting hole for how to grow nectarines at home, the secret lies in the walls. Roughen the sides with a fork so roots can grip the soil instead of circling a slick surface.
Allow the excavated topsoil to rest on a tarp. Mix one third well-rotted compost with two thirds native soil; never introduce artificial fertiliser at planting time! The base of the hole should remain unturned, firm, so the tree does not sink later. I have seen poor drainage undo good planting. Watch for:
- water pooling after a storm
- soil feeling clammy in summer
- earthworms avoiding the topsoil
If these signs appear, mound the soil or dig a test pit first. That preparation pays dividends for decades.
Planting Bare-Root Trees Step by Step
Site preparation starts a month before planting. Bare-root trees arrive dormant, so the soil must be ready when they do. Clear the area of weeds and debris, then check drainage again after heavy rain.
Follow this sequence when your bare-root nectarine arrives:
- Soak the roots in water for two to six hours.
- Trim broken or damaged roots with clean secateurs.
- Set the tree on a small mound of soil in the hole’s base, spreading roots evenly.
- Position the graft union above the soil line. I use a stick laid across the hole to verify the depth.
- Backfill with the soil and compost mix in stages, firming gently as you go.
Water thoroughly to settle air pockets. Stake the tree loosely for the first season, using a flexible tie so the trunk moves slightly. This builds a strong root system, exactly what you need for how to grow nectarines at home.
Watering and Mulching Right After Planting
The first watering after planting sets the tone for the entire season. Your nectarine tree needs deep, slow moisture to encourage roots to push beyond the planting hole into the surrounding earth. A quick sprinkle does more harm than good. It lures roots to the surface where they will bake in the Highveld sun or rot in a sudden downpour just as easily. Use a gentle hose at a trickle for a full hour, moving it around the drip line, not just the trunk.
Keep the soil consistently damp for the first six weeks. This is the period of greatest stress. The tree is waking up in a strange place, and every leaf it unfurls depends on the water you give it now.
– Water every three days if the weather is mild.
– Water daily when the mercury climbs past 30 degrees Celsius.
– Check the soil with your finger. Insert it to the second knuckle. If it feels dry, water.
Mulching right after planting is your best defence against moisture loss. Spread a generous layer of organic material, like compost, straw, or aged wood chips, around the tree in a wide circle. Keep it at least ten centimetres away from the trunk to prevent collar rot. This blanket regulates soil temperature, suppresses weeds that compete for water, and slowly feeds the soil as it breaks down. This simple act of care transforms a struggling sapling into a thriving tree, a lesson learned only by getting your hands in the good earth. Understanding the rhythm of water and mulch is a core part of knowing how to grow nectarines at home successfully.
Year-Round Care and Maintenance
Watering Schedules for Different Growth Stages
A mature nectarine tree in midsummer can draw over fifty litres of water from the soil weekly! That reality reshaped my irrigation strategy. Young trees have shallow roots, so consistent moisture is non-negotiable. I give them a deep soak twice weekly during the active growing season.
Once the tree matures, I reduce frequency but increase volume. Many enthusiasts falter here, watering daily and shallowly, forcing roots to linger near the surface. When you learn how to grow nectarines at home, you discover the dormant period is critical. During winter, I water only once a month, and only if the soil feels dry.
For established trees, I keep a schedule:
- Bloom: soak every 5 days
- Summer: soak every 7 days
- Autumn: taper to every 14 days
Mulch helps retain moisture, but I always pull it back from the trunk to avoid collar rot. Overwatering drowns roots just as quickly as drought.
Fertilizing Nectarines Organically
Organic fertilizing is where most home orchards fail. When learning how to grow nectarines at home, gardeners often overfeed, forcing lush leaves while fruit remains scarce. Organic feeding respects a slower rhythm. In early spring, I work composted manure into the topsoil, just beyond the drip line. By midsummer, the tree demands more. A liquid seaweed feed every three weeks keeps trace minerals flowing.
For young trees, I apply a balanced organic pellet once a month, but never after late summer. Late nitrogen encourages soft growth that winter will punish.
The schedule for mature trees:
- Spring: mature compost and bone meal
- Pre-bloom: kelp extract for flower set
- Post-harvest: rock phosphate for root strength
Excess organic matter can acidify the soil, so I test pH every second season. This vigilance separates a thriving tree from a dormant one.
Pruning for Structure and Airflow
Pruning shapes the life of a nectarine tree. When learning how to grow nectarines at home, many gardeners prune only in winter and wonder why yields drop. I prune for structure during dormancy, removing crossing branches and keeping the center open. A vase shape lets sunlight reach every fruiting spur.
Summer pruning maintains airflow. In January, I pinch back vigorous shoots to control height. Good airflow reduces fungal disease, a real concern in humid South African summers. I remove water sprouts and inward growing branches. They divert energy from fruit production.
- Remove dead wood first
- Cut at a 45 degree angle
- Keep the center free
Clean tools prevent disease. Step back after each cut and assess. A well structured tree carries heavy crops without splitting. This attention to pruning is central to how to grow nectarines at home.
Thinning Fruit to Improve Size and Flavor
Every nectarine tree can carry thousands of blossoms, but it cannot mature them all. I have seen trees in Gauteng collapse under the weight of unthinned fruit, the branches splitting and the fruit turning pale and tasteless. Thinning fruit is the most overlooked step in learning how to grow nectarines at home. When fruit reaches marble size, I remove the smallest and damaged ones, spacing the rest a hand’s width apart. On a standard tree, remove sixty to seventy percent. It feels wasteful, but the tree rewards you with fruit that tastes like nectarines.
- Fruit smaller than a 5 rand coin
- Pairs touching each other or a branch
- Any nectarine with a brown spot or misshapen form
Thinning also balances the tree’s energy. A loaded tree stops growing wood and tries to ripen every fruit, leading to watery nectarines and a weak harvest. Force the tree to concentrate on remaining fruit. That is how to grow nectarines at home.
Protecting Blossoms from Late Frosts
In South Africa, the false spring of late August can be deceptive. Nectarine trees break dormancy early, and a single cold front rolling over the Highveld can destroy an entire bloom.
Monitor forecasts from early August through mid-October. When temperatures threaten to drop below two degrees Celsius, cover young trees with frost cloth before sunset.
- Water the soil thoroughly the evening before a frost event
- Remove covers by mid-morning so bees can reach the blossoms
This vigilance matters for anyone learning how to grow nectarines at home, since a lost bloom delays the season and reduces the harvest.
Winterizing and Dormant Season Care
Dormancy is a biological pause. In South Africa, the nectarine tree does not die; it waits, holding energy in its roots while branches stand bare against the Highveld wind.
Winterizing demands attention to this stillness. I have watched growers lose entire trees to waterlogging, roots suffocating in soil that never drained. The cold requirement, the tree’s vernalization, is satisfied during these weeks. The soil must stay moist but not flooded. Mulch insulates the root zone against nightly temperature swings. The tree needs no feeding during this rest period. Forcing growth too early weakens next season’s bloom!
- Bark stays supple and free of oozing sap
- Buds remain tight without premature swelling
- The root zone holds moisture without pooling
Learning how to grow nectarines at home includes respecting this dormant rhythm. How the tree spends winter determines how it wakes in spring.
Managing Pests and Diseases Naturally
Common Insect Pests: Aphids, Borers, and Mites
When you learn how to grow nectarines at home, you discover that aphids, borers, and mites appear without warning. Warm South African conditions suit these pests perfectly. Aphids cluster on new shoots, borers tunnel into the trunk, and mites discolor leaves with their feeding.
Natural controls can be encouraged before any spray is mixed. Beneficial insects do much of the work:
- Lacewings and ladybirds consume aphids in large numbers.
- Nematodes in the soil seek out borer larvae.
- Predatory mites keep spider mite outbreaks from spreading.
Sometimes intervention is necessary. A strong jet of water removes aphid colonies quickly. Sticky bands around the lower trunk prevent borers from climbing. These measures preserve the surrounding insect life while protecting your crop.
Fungal Diseases: Leaf Curl, Brown Rot, and Powdery Mildew
Fungal diseases arrive with the rain. Leaf curl distorts young nectarine leaves each spring. Brown rot attacks ripening fruit, leaving shriveled mummies on the branches. Powdery mildew spreads across foliage when nights stay cool and humid.
Anyone learning how to grow nectarines at home soon discovers that airflow is the first line of defense. Open the canopy so morning sun dries dew quickly. Remove infected leaves and fruit promptly, and never compost them.
- Spray copper before buds swell to stop leaf curl.
- Remove double fruits to reduce brown rot entry points.
- Apply wettable sulfur weekly once mildew appears.
South African conditions favor these diseases during wet winters and humid summers. Consistent orchard hygiene keeps fungal pressure low without disrupting beneficial insect populations.
Preventive Cultural Practices
The best approach to managing pests in a nectarine tree starts before any problem appears. Healthy trees resist damage far better than stressed ones. Anyone learning how to grow nectarines at home discovers that prevention requires less effort than cure. The most effective tools remain simple and observable.
A weekly walk around the tree reveals problems early. Turn over leaves, inspect the bark near the ground, and watch for sticky sap or misshapen growth. Remove weeds that shelter pests and pick up dropped fruit before it rots.
- Check for eggs on leaf undersides each week.
- Remove damaged bark to expose borer tunnels.
- Keep grass away from the trunk to reduce hiding spots.
Encourage predatory insects by planting nectar rich flowers nearby. Lacewings and ladybirds keep aphid populations in check. Good soil life also strengthens the tree from root to tip.
Organic Sprays and Biological Controls
Organic sprays earn their keep when pest numbers climb despite clean orchards. Neem oil, applied late in the afternoon, coats aphid colonies and smothers mites while bees stay safe in hives. Sulphur keeps powdery mildew at bay during humid Highveld summers, but never follow it with an oil spray. The reaction burns young shoots.
Biological controls work deeper. Predatory mites hunt spider mites beneath leaves, and Bacillus thuringiensis kills leaf rollers before they tunnel into fruit. Anyone serious about how to grow nectarines at home should treat these as allies.
- Spray copper oxychloride during the dormant season to curb leaf curl.
- Release ladybirds in spring when aphid numbers rise.
- Plant cosmos and marigolds along the drip line to feed hoverflies.
Spray only when the tree demands it. Blanket applications wipe out beneficial organisms and breed resistant pests. Match the remedy to the species, and the tree stays productive without shortcuts.
Harvesting, Storing, and Enjoying Your Crop
Signs of Ripeness and Ideal Harvest Timing
If you are figuring out how to grow nectarines at home, the harvest moment is both triumphant and terrifying. A nectarine picked three days early is a crime against your own patience. The fruit may look glorious, but ripeness is a specific condition, not a general mood.
- The background colour shifts from green to a deep golden yellow
- The fruit yields slightly to gentle palm pressure, never fingertip prodding
- The stem detaches with a clean twist, leaving no tearing at the branch
Pick in the early morning while the fruit is still cool. I promise, slightly firm nectarines will ripen on your counter over two days, after which they demand refrigeration. In South Africa’s summer heat, a chilled nectarine is a small luxury. Eat them within a week, or slice and freeze for a winter reminder.
Proper Picking Techniques to Avoid Bruising
When you learn how to grow nectarines at home, you quickly discover that bruising ruins fruit faster than any pest. The moment of harvest demands respect. Use two hands, always. Cradle the nectarine in your palm, twist gently, and let the stem detach cleanly. Never squeeze, never prod, never drop.
Your picking container matters as much as your technique:
- Line the basket with a soft cotton cloth
- Place fruit in a single layer, never stacked
- Keep the basket in the shade between trees
Sort your harvest immediately after picking. Ripe nectarines go straight to the fridge. Slightly firm ones ripen on the counter over two days. In South Africa’s heat, that chilled fruit becomes a small luxury. Slice and freeze the surplus for winter, and you are never far from summer.
Short-Term Storage and Fresh Eating
Nectarines from your own tree lose sweetness quickly without proper short-term storage. In South Africa’s climate, the fridge protects the harvest. Keep ripe fruit in the crisper drawer, unwashed, and it holds its flavor for up to five days. Cold slows the enzymes that soften flesh, yet it also dulls aroma. Remove the fruit an hour before eating to revive the scent.
Follow these rules for fresh eating:
- Wash only what you will eat; water strips the protective bloom.
- Chill sliced nectarines for a quick snack or breakfast topping.
- Store stone fruit away from strong-smelling foods like onions.
The reward for learning how to grow nectarines at home is fruit that ripens on the branch, never in a truck. That difference shows in every bite. Savor it while the season lasts.
Freezing and Preserving Nectarines
The season ends too soon. Freezing changes the rules. If you have learned how to grow nectarines at home, you know the harvest arrives in batches. Preserve the surplus while it lasts.
Slice firm, ripe fruit and toss the pieces with a little lemon juice. This slows oxidation. Pack the slices in a single layer on a tray, freeze overnight, then transfer them to sealed bags. The flash freeze keeps the pieces separate so you can pour out only what you need.
- Peel and slice the fruit.
- Treat with lemon juice.
- Freeze in a single layer.
- Bag and label.
Frozen nectarines lose their crispness. Do not expect a fresh bite from the freezer. Use them for smoothies, compotes, or a deep winter jam. The flavor of the tree carries through the cold, even if the texture does not.
Tips for Getting the Sweetest Flavor
Leave the fruit on the branch until it gives under thumb pressure. Sugar spikes in those final hours. For anyone learning how to grow nectarines at home, this harvest moment defines sweetness. Pick in the morning while the flesh is cool. Twist gently to remove the stem.
Store unwashed nectarines at room temperature, stem side down, away from direct sun. Chilling dulls flavor. Allow firm fruit to ripen on the counter for a day or two. Once ripe, refrigerate for up to five days, then warm before eating.
Cold numbs sweetness, so let each fruit sit out for an hour before slicing. Cut just before serving. A dash of lime can brighten the flavor. Keep these points in mind:
- Do not wash until ready to eat.
- Check daily and remove softening fruit.
- Keep nectarines away from apples and bananas.



0 Comments