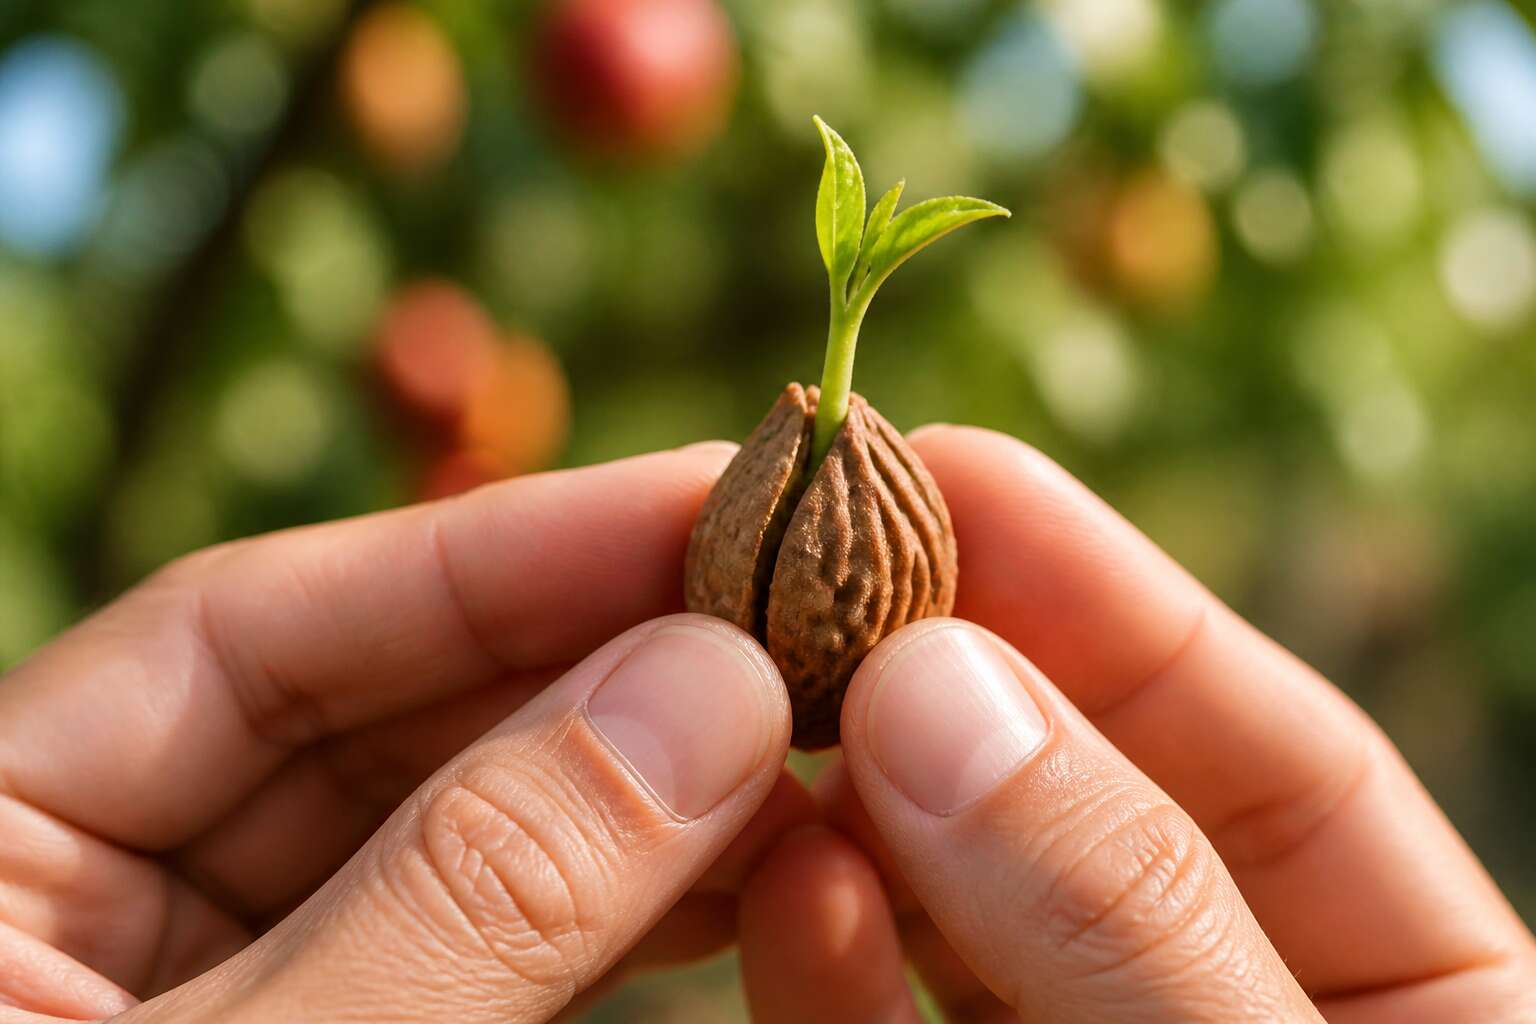
Why Start a Nectarine from a Pit?
The Genetic Gamble: What You Might Get
A nectarine pit holds an uncertain future. Unlike grafted trees, a seed carries combined traits from two parents. The resulting fruit might be smaller, tangier, or indistinguishable from a wild peach. Yet this unpredictability is the point. For the patient gardener, growing nectarines from seed offers a controlled exercise in botanical chance. Each pit contains a unique set of alleles.
Some growers seek specific flavours. Others hope to resurrect a lost variety. The process demands years, and most results disappoint. But the act itself, planting a stone and watching it break, connects us to agriculture’s ancient rhythms.
Consider what you accept:
- A possible hybrid
- A longer wait
- A tree with no guarantees
That uncertainty, for some, is precisely the reward.
Essential Tools and Materials
A single nectarine pit weighs less than a coin, yet it holds every instruction needed for a new tree. Starting from a pit costs almost nothing, and for South African gardeners it offers a way to grow fruit suited to their local conditions.
For growing nectarines from seed, the essential tools are few. A knife, a bowl of water, and a bag of moist sand are enough for the initial stratification. Later, small pots and a loamy soil mix support the young seedling.
- Fresh pits from ripe local nectarines
- Perlite to keep the soil porous
- A waterproof label for each planting
Choose pits from farmers’ markets or your own tree, not from imported fruit. The rewards come slowly, but the act of planting a stone is honest work.
Selecting the Right Nectarine Variety
South African orchards discard millions of nectarine pits each year, yet most home gardeners never think to plant one. Growing nectarines from seed is a practical choice for those who want fruit adapted to their own district. A pit costs nothing, and it carries the history of a tree that produced well in your region.
Selection shapes the outcome. When growing nectarines from seed, choose pits from fruit that prospered in your province, not from imported nectarines that never faced a South African winter. Heirloom cultivars carry decades of local resilience. Reliable options include:
- Pioneer, a yellow-fleshed type suited to the Western Cape
- Sungold, which withstands Highveld frost
- Maybright, an early cultivar with sweet flesh
In my experience, the variety’s local origin matters more than any nursery label. Fruit from a neighbour’s tree in Limpopo will behave differently from a pit sourced overseas. Your climate reveals the truth in time.
The Role of Cold Stratification
Most nectarine pits fail in South African gardens because they never experience winter. The embryo waits for a cold signal that the soil simply will not deliver, especially in the subtropics. Cold stratification is the deliberate act of providing that signal. You are not accelerating the process; you are satisfying a condition the seed has no intention of ignoring.
For eight to twelve weeks, the pit sits in a refrigerator at temperatures between 1°C and 5°C, buried in a lightly moist medium. Consistency matters more than precision. A fridge that cycles warm disrupts the dormancy break, and the pit stays silent indefinitely.
The procedure itself is modest:
- Soak the cleaned pit for 24 hours.
- Seal it in a bag with damp perlite or peat.
- Refrigerate and inspect weekly, discarding any mould.
This waiting period is where most people abandon growing nectarines from seed. They interpret the empty weeks as failure. The tree interprets them as permission. Patience is the actual variable under your control.
Extracting and Preparing Nectarine Seeds
Cleaning and Drying the Pit Properly
I want to share a small truth about growing nectarines from seed: the pit’s preparation decides its fate. A ripe nectarine yields its stone readily, so choose fruit with a gentle give. I twist rather than slice to protect the pit. Freed, the stone wears sticky sugars that invite mold. Rinse it under lukewarm water, scrubbing with a soft brush to remove every residue. Immediate friction works better than soaking.
- Inspect for cracks or blemishes before storage
- Keep it in a paper bag if stratifying is delayed
Now comes the quiet art of drying. A damp pit rots from within, silently killing your efforts. Place the pit on a wire rack in a shaded, airy corner. Turn it daily for three to five days until it feels bone dry. That dryness shields against decay. This step is unglamorous yet vital.
Cracking the Pit Without Damaging the Seed
A pit is a vault, and cracking it demands the patience of a safecracker. The stone sits armored in a ridged shell, and forcing it with brute strength is the fastest way to crush the fragile kernel inside. I hold the pit flat in my palm, using a nutcracker or the flat side of a heavy knife. The goal is a clean split along the natural seam, not a shatter.
Apply slow, steady pressure until you hear a subtle pop. This sound signals the seam has given way, not the seed itself. If the shell splinters, you risk scoring the embryo. A damaged seed will often still germinate, but the resulting root may be weak, which defeats the purpose of growing nectarines from seed.
Once the shell separates, the seed sits inside encased in a papery brown skin. Remove this gently. It peels away easily, and leaving it on is not harmful, but it can hide damage. Inspect the seed closely for any discoloration or soft spots.
– Brown or dark patches indicate rot.
– A mushy texture means the seed is dead.
– A shriveled appearance signals dehydration.
A healthy seed is plump and glossy, with a smooth surface. This extraction process converts a hard, lifeless pit into a living possibility. The seed is now ready for the moist chilling period, but it must never dry out completely. Once you reach this stage, timing becomes critical. The delicate embryo inside is now exposed and vulnerable. Keep that seed wrapped in the damp substrate immediately, and the entire endeavor will move one step closer to a fruitful reality.
Checking Seed Viability with a Float Test
Now that the seed lies bare, perform the float test for growing nectarines from seed. I fill a small bowl with lukewarm water and set the seed on the surface. A healthy seed sinks because its embryo retains sufficient density. A shriveled or damaged seed floats. This test takes fifteen seconds and prevents wasted effort!
For a systematic check, follow these steps:
- Fill a clear jar with lukewarm water.
- Drop the naked seed into the jar.
- Watch it for fifteen seconds. A sinking seed passes; a floating seed fails.
After the test, prepare the surviving seed for stratification. Blot it dry, then tuck it into your damp chilling medium immediately. Do not let it sit exposed. This sequence ensures your efforts in growing nectarines from seed remain focused on living embryos, not dead husks. One final note: any seed that floats after repeated attempts should be discarded without hesitation.
Mastering Cold Stratification Length and Temps
The naked seed, once blotted dry, enters a vulnerable liminal state. Exposure to air for even an hour can desiccate the embryonic tissues, so the transition from float test to chilling medium must be immediate to succeed with growing nectarines from seed. I have found that the stratification phase is where most amateur horticulturists falter, not from negligence, but from a misunderstanding of the biological process they are attempting to mimic.
Cold stratification is not a simple refrigeration trick; it is a physiological trigger that breaks embryonic dormancy. The stone fruit embryo requires a specific period of moist, low-temperature exposure to degrade abscisic acid, the growth inhibitor present in the seed. Without this precise cold signal, the seed will remain dormant indefinitely, regardless of how warm or sunny your South African garden becomes.
The chilling period must hover between 1°C and 7°C. This range is critical; temperatures above 7°C risk premature germination or fungal rot. For growing nectarines from seed, I typically advise a stratification duration of 10 to 12 weeks. Some cultivars from colder regions may require up to 14 weeks, but 12 weeks serves as a reliable median for most hybrids.
The choice of chilling medium also influences success. A 50/50 mix of damp perlite and peat moss, placed inside a sealed zip-lock bag, provides the ideal microclimate. The perlite ensures aeration, preventing the seed from suffocating, while the peat retains the moisture balance necessary for the process. The medium should feel like a wrung-out sponge, not a soaked one.
The necessity of precise temperature is the reason I recommend a dedicated refrigerator. Household fridges fluctuate too much when opened frequently. A stable environment is non-negotiable for this stage of growing nectarines from seed.
Once a week, inspect the bag. Remove any signs of mold or condensation promptly. A seed that has undergone successful stratification will often show a small, white radicle tip after week eight. This is the moment of transition, indicating the seed is ready for the warming phase.
Here are the parameters you must monitor during this period to ensure success:
– Keep the temperature stable between 1°C and 7°C; avoid fluctuations.
– Maintain the medium’s moisture, but never allow standing water.
– Check weekly for fungal growth, removing any infected seeds immediately.
After the chilling duration has elapsed, the seeds require a gradual shift to warmer conditions. The transition should not be abrupt. Move the bag to a cool room for two days before sowing. This gradual awakening prevents shock and encourages a robust taproot emergence, a crucial final step for the seed you have so carefully prepared.
Paper Towel Method vs. Direct Soil Planting
The pit has been cracked, the seed freed, and the chill endured. Now comes the choosing. The paper towel method suits those who crave observation in growing nectarines from seed. Fold the seed into a damp sheet, nestle it inside a sealed bag, and place it in the warmth. The radicle appears within days, visible through the fabric. Direct soil planting, another route for growing nectarines from seed, demands faith. Bury the seed two centimeters deep in a gritty mix, then resist the urge to dig.
The trade-offs are stark. Paper towels let you spot mold early, but they dry out rapidly. Soil buffers temperature swings, but a failed germination remains invisible for weeks.
- Paper towel method: monitor the seedling’s emergence every two days.
- Direct soil planting: water sparingly and wait for a shoot to breach the surface.
Planting Your Nectarine Seed Indoors
Choosing the Ideal Potting Mix
There is a quiet satisfaction in pressing a nectarine pit into warm soil while the Cape winter rages outside. For growing nectarines from seed, the indoor start becomes a private greenhouse, a space where patience and warmth work together! I always choose a container with drainage holes, at least ten centimeters deep, because taproots need room to stretch.
The ideal potting mix, however, is where many efforts falter. Nectarine seedlings require soil that never remains waterlogged. A blend of one part coarse sand, one part perlite, and two parts coconut coir offers drainage and aeration. This composition holds moisture without suffocating tender roots, providing a stable environment for early growth.
- It crumbles easily when squeezed, never clumping.
- It drains within seconds after watering.
- It smells earthy, not sour or musty.
Correct Planting Depth and Spacing
Planting depth is a matter of simple arithmetic. For growing nectarines from seed, bury the seed about two to three centimeters deep. Any shallower and the seed may dry out; any deeper and the seedling exhausts itself before reaching the surface. Use a pencil to poke the hole in the potting mix, drop the seed in, and cover it gently.
Spacing matters more than people expect. If you are sowing multiple seeds in one container, place each one at least five centimeters apart. This prevents roots from tangling below the surface. After the seedlings emerge, you can transplant the weaker ones to their own pots.
- Press the soil down lightly after covering the seed.
- Mist the surface with water to avoid disturbing the mix.
- Label each spot with the variety and planting date.
Orientation is not fussy. A cracked pit planted on its side will find its own direction. The root will grow downward, and the sprout will reach upward. That flexibility means you can focus on consistency of warmth and moisture, which is the real foundation for successful growing nectarines from seed.
Creating a Warm, Humid Germination Environment
Move the pot to a room that stays consistently warm. A windowsill with indirect light works, but avoid spots that get cold at night. The soil temperature matters more than air temperature. Use a heat mat to keep the mix near 24 degrees Celsius. That gentle bottom warmth tells the seed it is time to wake up.
Humidity is the other half of the equation. Cover the container with a clear plastic bag or a propagation dome. This traps evaporation and keeps the surface moist without you having to water constantly. Wipe away excess condensation each morning. Leave the cover open for five minutes to refresh the air.
Growing nectarines from seed indoors demands consistency. The seed responds slowly to these conditions, and that is normal. You are not forcing it. You are simply holding the environment steady while the embryo makes its decision.
Monitoring Moisture and Airflow
Once your nectarine pit is tucked into its pot, monitoring moisture becomes a daily ritual. The soil should stay evenly moist, never saturated. Insert a finger into the mix each morning; if the top centimetre is dry, water lightly. Overwatering invites damping-off, a fungal disease that collapses young stems.
Airflow requires equal attention. Stagnant air under a humidity dome breeds mould. Open the cover for five minutes daily, then reseal. This routine prevents fungal growth without sacrificing the humidity your seed needs.
- Check moisture at the same time daily to build consistency
- Ventilate whenever condensation clouds the plastic
- Remove the cover entirely once the seedling appears
Growing nectarines from seed indoors demands this balance of wet and airy. Excess water kills the embryo; insufficient airflow invites disease. When growing nectarines from seed, hold the middle ground and trust the seed’s own timeline.
Timing Your Planting for Best Results
The nectarine pit does not care about your calendar, but your calendar should care about the pit. Cold stratification lasts eight to twelve weeks, and once that period ends, the seed begins its own countdown. Every delayed day is a day stolen from the seedling’s first growing season.
For South African gardeners, aim to finish stratification in late winter, around August. This timing gives the young tree the full spring and summer to establish roots before the next cold snap. Finish stratification during summer and the seedling faces January heat with a fragile root system.
Watch the seed daily once the stratification window closes:
- A root tip pushes through the cracked coat
- The papery seed coat splits along its seam
- The root extends before the first true leaves form
Growing nectarines from seed indoors succeeds when you act inside this narrow window. The seed will not hold forever, and when growing nectarines from seed, the season will not wait for you.
Recognizing and Handling Sprouting Signs
The first true sign of life is often the most subtle. A pale root tip, smooth and ivory, will push through the cracked seed coat. You will miss it if you blink. The papery coat, which has protected the embryo for weeks, splits along its seam. This is the seed’s decisive moment. The root extends downward before the first true leaves even consider forming. This sequence is nonnegotiable for growing nectarines from seed indoors.
Everything depends on your response during this narrow window. The moment you see that root, the seedling must be transferred. It requires soil immediately. The cycle proceeds in a predictable order:
1. The root tip emerges from the seed coat crack
2. The radicle grows downward, anchoring into the medium
3. The hypocotyl arches upward, pulling the seed shell above the soil line
4. The cotyledons unfurl to feed the young plant
Preparing the pot ahead of time saves crucial hours. Have a container filled with moist potting mix ready before stratification ends. Make a shallow depression in the centre. When the root appears, place the seed gently with the root pointing down. Cover it with a thin layer of mix, no deeper than a few centimetres. The seed is fragile. The root will break if handled roughly.
Light conditions remain irrelevant until the sprout breaks the surface. Keep the pot in a warm, bright spot but out of direct sunlight for the first few days. The top of a fridge or a windowsill inside a well-lit room works well. The emerging plant will seek light on its own. Your role is limited to creating stability. Growing nectarines from seed requires patience, but it also demands swift, decisive action at this critical stage.
The seed shell may cling to the cotyledons as they emerge. This is common. A light mist of water can soften the shell, allowing it to drop off naturally. Do not peel it off forcibly. A damaged seedling rarely recovers. Watch for the first true leaves, which will look nothing like the rounded cotyledons. Once those appear, the plant has successfully transitioned from a seed to a seedling.
Caring for Young Nectarine Seedlings
Maximizing Light Exposure with Grow Lights
Most amateur horticulturists mistake a warm room for adequate light. A nectarine seedling will stretch, pale and thin, toward any distant window, and this is precisely where the dream of growing nectarines from seed often quietly expires. I have watched it happen. The remedy is not mysterious, but it does require deliberate equipment.
You need grow lights, and you need to run them without sentimentality. Position the fixture so the bulb hovers a few centimetres above the seedling and leave it on for twelve to fourteen hours each day. The young leaves should respond by deepening into a rich, healthy green. If the foliage looks washed out, the light is too far away.
Check your seedlings against these markers every morning:
- The stem stands upright without leaning toward one side.
- The second set of leaves appears within ten days of the first.
- The root collar remains hidden just below the soil line.
Grow lights are the difference between a frail stem and a sturdy trunk. Once your seedling has produced four true leaves, you may begin the slow, rewarding process of moving it outdoors.
Watering Schedules and Fertilizer Needs
There is a quiet tragedy in overwatering, and I have committed it. The soil looks dry on top, so you pour, and the roots drown inches below. For those growing nectarines from seed, the watering schedule is a discipline of restraint, not generosity. Water deeply when the top two centimetres of soil feel dry to the touch, then wait. The seedling should never sit in a saucer of runoff.
Fertiliser is a gentler art. A weak dose of balanced liquid feed every two weeks supports leaf development without burning tender roots.
Here is how I check the soil before every watering:
– Press a finger into the mix.
– If it comes out dry, water until it drains.
– If it comes out damp, close the watering can.
The act of growing nectarines from seed is measured in these small, deliberate pauses.
Thinning and Potting Up Seedlings
When your nectarine seedling unfurls its second set of true leaves, the real work begins. Thinning feels brutal, but it is necessary. I once kept every sprout in a single pot, and the strongest one crushed its neighbours. For growing nectarines from seed, you must select a single champion.
Snip the weaker seedlings at soil level with sharp scissors. Never pull them, as that disturbs the roots of the chosen one. After thinning, give the survivor a full week to recover before any disturbance.
- Prepare a 15 cm pot with fresh, well-draining mix.
- Water the seedling an hour before the move.
- Gently lift the entire root ball with a spoon.
- Settle it in the new pot at the same depth.
Potting up forces the roots to explore new territory. The seedling may pause for two days, then new leaves appear. Growing nectarines from seed demands patience through this transition. Keep the soil consistently damp, never saturated, and watch for signs of fresh growth.
Hardening Off Before Moving Outdoors
The seedling has survived your careful hand, yet the African sun outside is far more intense than any grow light. Hardening off is the transition between the sheltered pot and the garden, a step that even experienced growers rush at their own expense. I move my young trees to a shaded corner of the patio for one full hour, then carry them back inside. The process feels painfully slow, but it builds the cellular strength they need.
Over the following week, I extend those outings. Morning light is gentler in South Africa, so I expose the saplings to direct rays only before ten in the morning. The wind deserves equal respect. A sharp Highveld gust can shred a tender leaf in seconds, so I position the pots against a north-facing wall.
- The first two days, keep the seedling in dappled shade.
- Days three and four, offer morning sun only.
- On day five, leave it out until noon.
This gradual exposure is the final hurdle for anyone growing nectarines from seed. After a full week of this routine, the young tree is ready for its permanent home in the earth.
Avoiding Damping Off and Other Seedling Diseases
After hardening off, the real test of your vigilance begins. Damping off shows up as a dark, constricted stem at soil level, often overnight. In my experience, prevention beats any cure. When growing nectarines from seed, I inspect every seedling each morning without fail. Moisture control is the foundation of that effort. I water deeply but rarely, letting the top centimetre dry completely before the next drink. Air circulation matters just as much. A gentle breeze from an open window stops fungal spores from settling on the delicate bark.
The warning signs are easy to miss at first.
- A wilting seedling despite damp soil
- White or grey fuzz near the base
- A stem that has turned mushy to the touch
These symptoms demand immediate action. I remove affected plants without hesitation, taking the surrounding soil with them. That ruthless discipline has kept my batch thriving through the Highveld summer.
Pruning Basics for Future Tree Structure
Once your seedling has settled into its permanent spot, the focus shifts to shaping the tree. A nectarine tree’s future form is decided in these first months. I let the young tree grow freely until it stands about 60 centimetres tall, then observe how the branches arrange themselves through the Highveld summer.
The open vase form suits nectarines best. It lets sunlight reach every fruiting spur and moves air through the canopy. When growing nectarines from seed, I keep three or four well-spaced lateral branches pointing outward, remove shoots heading toward the centre, and pinch back vertical growth to encourage width over height.
Pruning at this stage demands patience. The tree will want to grow tall and narrow. Keep encouraging the wider spread instead, one careful cut at a time, shaping the branches that will carry the fruit in seasons ahead.
Transplanting and Long-Term Orchard Care
Selecting the Perfect Outdoor Location
Transplanting a nectarine seedling demands patience. The outdoor location determines whether your tree thrives or merely survives. Full sun is non-negotiable, but so is shelter from harsh afternoon winds, especially in regions like the Western Cape where gusts can snap young branches.
Well-draining soil prevents root rot during heavy winter rains. Consider the mature footprint of the tree. A seedling grown for years will need several metres of clearance from walls and buildings.
- Observe the area across all seasons before committing.
- Check water runoff patterns after storms.
- Account for frost pockets in low-lying ground.
Growing nectarines from seed is a decade-long conversation with your garden. Choose a spot where the tree can stay for its entire life.
Amending Soil for Drainage and Nutrient Needs
When transplanting a nectarine seedling, amend the soil before the roots ever touch the ground. Heavy clay requires generous compost and river sand to improve drainage. Test percolation by filling the hole with water and waiting an hour. If water lingers, dig wider, not deeper. Growing nectarines from seed depends on this foundation.
Nutrient needs shift over time. New seedlings need phosphorus for root development. Established trees demand more potassium. Apply slow-release fertiliser after transplanting. For specific guidance, consider this sequence:
- Dig a hole twice the width of the root ball
- Mix native soil with 30% compost
- Add bone meal for phosphorus
- Place a layer of gravel at the base
Mulch after settling to retain moisture and moderate soil temperature. Rework drainage yearly around the drip line. Avoid disturbing the root zone once the tree begins fruiting. This patient approach ensures the tree’s longevity.
Planting Timelines by Climate Zone
Transplanting a nectarine seedling in South Africa demands attention to your specific climate zone. The Western Cape’s Mediterranean rhythm, with wet winters and dry summers, suits an autumn planting. KwaZulu-Natal’s subtropical humidity pushes planting toward late winter. The Highveld’s frost risk means waiting until early September. Each region changes the calendar for growing nectarines from seed.
Consider these timelines:
1. Western Cape: transplant in April or May.
2. KwaZulu-Natal: transplant in August.
3. Highveld: transplant in September after the last frost.
4. Semi-arid regions: transplant in March to use winter rains.
Long-term orchard care for growing nectarines from seed follows this same map. Water deeply but rarely in the Cape. Watch for fungal pressure in the subtropics. Shield young trunks from Highveld sun. In my experience, the tree’s survival depends on reading your local seasons correctly.
Watering, Mulching, and Feeding Mature Trees
Transplanting a nectarine seedling is the moment of commitment in growing nectarines from seed. Dig the hole wide, not deep, so roots spread naturally in their new territory. Backfill with native soil. Resist enriching the hole with compost. The tree must learn to feed itself.
Watering mature trees follows the Cape’s natural rhythm. A deep drench once a fortnight outperforms a daily sprinkle. Roots chase moisture downward, building drought tolerance. Autumn rains can do half the watering if you let them.
Mulch serves a practical purpose. Wood chips around the drip line keep soil temperature steady and suppress weeds. Keep mulch a hand’s breadth from the trunk. Direct contact invites fungal rot.
Feed mature trees on a simple calendar:
- August: balanced 2:3:2 fertilizer at first bud swell
- October: potassium-rich feed for fruit development
- January: light seaweed extract spray after harvest
Pale leaves signal underfeeding. A leafy mess with no fruit signals overfeeding. Growing nectarines from seed means reading the tree’s actual needs.
Protecting Young Trees from Pests and Frost
Young trees face threats. Aphids cluster on new growth, and codling moth finds fruit before you do. Inspect leaves weekly! A sharp water blast handles light infestations. For fruit fly, hang traps before fruit sets. Growing nectarines from seed means watching for these signs early, before damage compounds.
Frost threatens April and September, especially inland. Cover young trees with shade cloth on cold nights. Remove coverings by mid-morning so condensation doesn’t invite rot. The trunk needs the most protection. Wrap it in cardboard or burlap for the first two winters.
Check for these frost warning signs:
- Leaf edges blacken overnight
- Bark splits along the trunk
- New shoots wilt despite adequate water
Prune damaged wood only after the last frost passes. The tree’s energy reroutes once you remove dead weight. Track how the tree responds through the seasons. This habit carries you through every stage of growing nectarines from seed.
Patience and Expectations: When Fruit Will Appear
Transplanting a nectarine seedling marks a clear turning point. The tree moves into its permanent plot. Choose a mild, overcast day. Gently tease out the root ball, keeping the soil intact. Settle it at the same depth as before.
The long wait begins now. Seed-grown nectarines take three to five years from sprout to first harvest. Some take longer. The first blossoms may appear and drop without setting fruit. That is normal.
Expect these milestones:
- The first year is all root and shoot growth.
- The second year brings height and branching.
- The third year often offers the first real blossoms.
Growing nectarines from seed asks for patience more than skill. The tree will fruit when it is ready. The flavour of that first harvest belongs to your soil and climate alone.



0 Comments